Bracing: what it is, its role in injury prevention and performance, and how to train it
Heavy squat, deadlift, push press or jerk: in all of these movements, force starts in the legs and hips, but it has to travel through your trunk to reach the bar. If the trunk gives way, force leaks out and your back takes the hit. Bracing is the skill that turns your trunk into a solid block, able to transfer force and protect your spine. On paper, it's simple and remarkably effective. And yet few athletes truly master it or actually train it. Good news: it can be learned.
What is bracing?
Bracing (as in bracing yourself for an impact) is a voluntary, simultaneous contraction of all the muscles surrounding the trunk: rectus abdominis, obliques, transversus abdominis and the back muscles too. Combined with a controlled breath, it raises the pressure inside the abdomen and stiffens the whole structure.
To picture it, think of your trunk as a cylinder: the diaphragm is the lid, the pelvic floor the base, the abs and back muscles the wall. When you breathe in and contract the whole wall at once, pressure builds inside the cylinder and it becomes rigid, like a full can you can't crush.
Bracing is neither sucking your belly in nor pushing it out. You don't hollow, you don't balloon: you tighten all the way around, as if you were about to take a punch to the stomach, and the pressure spreads 360°, to the front, the sides and the lower back.
How does it work? The role of intra-abdominal pressure
Bracing relies on a well-documented mechanism: the higher the intra-abdominal pressure, the stiffer the lumbar spine. By stimulating the diaphragm to raise this pressure without activating the abs, researchers measured an 8 to 31% increase in lumbar stiffness compared with rest (Hodges et al., 2005).
This mechanism runs automatically in everyday life. During fast arm movements, the diaphragm and transversus abdominis stay continuously active and intra-abdominal pressure rises in proportion to the forces the movement generates (Hodges and Gandevia, 2000). Bracing means making that reflex voluntary, stronger and better dosed when the load calls for it.
The question is how to contract. Comparing bracing with hollowing (drawing the belly in to isolate the transversus), Grenier and McGill (2007) concluded that bracing provides much greater lumbar stability, around +32% in their model. Another study shows that under a sudden perturbation, bracing limits spinal motion better than hollowing (Vera-Garcia et al., 2007).
Bracing, Valsalva and lifting belts: what's the difference?
The Valsalva maneuver is bracing taken to the max: you take a big breath, brace hard and hold the air by closing your glottis. It's the strategy for near-maximal loads. It produces very high pressures: over 200 mmHg of intra-abdominal pressure in a heavy squat, between 161 and 176 mmHg in the deadlift or leg press (Blazek et al., 2019). It also sharply raises blood pressure during the effort (MacDougall et al., 1985): keep it for short, maximal efforts.
A lifting belt doesn't brace for you. It gives you a wall to push against, which increases intra-abdominal pressure under heavy loads (Harman et al., 1989; Lander et al., 1990). Without solid bracing, it loses most of its value: skill first, tool second.
Why bracing matters for injury prevention
- 1
A protected spine under load. A stiff trunk limits unwanted lumbar spine motion when the bar is heavy, and spreads the stress across all structures rather than a single segment.
- 2
A trunk that reacts in time. Among 303 college athletes followed over several years, those whose trunk muscles reacted more slowly to a perturbation had a higher risk of low back injury (Cholewicki et al., 2005). Trunk control is a trainable quality.
- 3
Better-aligned knees and hips. The trunk steers what happens below it. In female athletes, poor trunk control, especially in the lateral plane, predicted the risk of knee ligament injury (Zazulak et al., 2007).
- 4
Better pressure management for the pelvic floor. A meta-analysis of nearly 4,800 women doing high-intensity functional training reports a 44.5% prevalence of urinary leakage, mostly during exertion (Dominguez-Antuña et al., 2023). Poorly dosed bracing that pushes pressure downward overloads the base of the cylinder. Bracing spread evenly 360°, synced with your breathing, helps manage that pressure better.
Why bracing matters for performance
The principle is summed up by a now-classic phrase: proximal stability for distal mobility (Kibler et al., 2006). Drop that line at the next post-WOD drinks and watch the room go quiet. In plain terms: a stable trunk gives your arms and legs a base to work from. The force your hips produce travels all the way to the bar instead of dissipating through a rounding back or a flaring rib cage.
In practice, every millimeter your trunk gives up under load is lost force. A spine that flexes at the bottom of the squat, ribs that flare in the push press or jerk, a pelvis that tips at the end of a set: all energy leaks that cap your loads and your efficiency.
Bracing is trainable, and its effects are measurable. In a controlled trial, 8 weeks of maximal bracing (2-second contractions, 5 sets of 10, 3 times a week) increased hip extension strength by 34.7%, trunk extension strength by 14.4% and maximal lifting power by 15.6%, with no other specific training (Tayashiki et al., 2016). Structurally, isometric trunk training is also what increases core stiffness the most (Lee and McGill, 2015).
Good to know
Bracing well means dosing it
Bracing isn't an on/off switch. For most everyday movements, a moderate co-contraction is enough, around 10 to 15% of maximal contraction (Vera-Garcia et al., 2007). Maximal bracing is for heavy loads. Two mistakes to avoid: bracing too little under a heavy bar, and bracing all-out all the time during a long effort, to the point where you can no longer breathe.
How to learn bracing in 5 steps
- 1
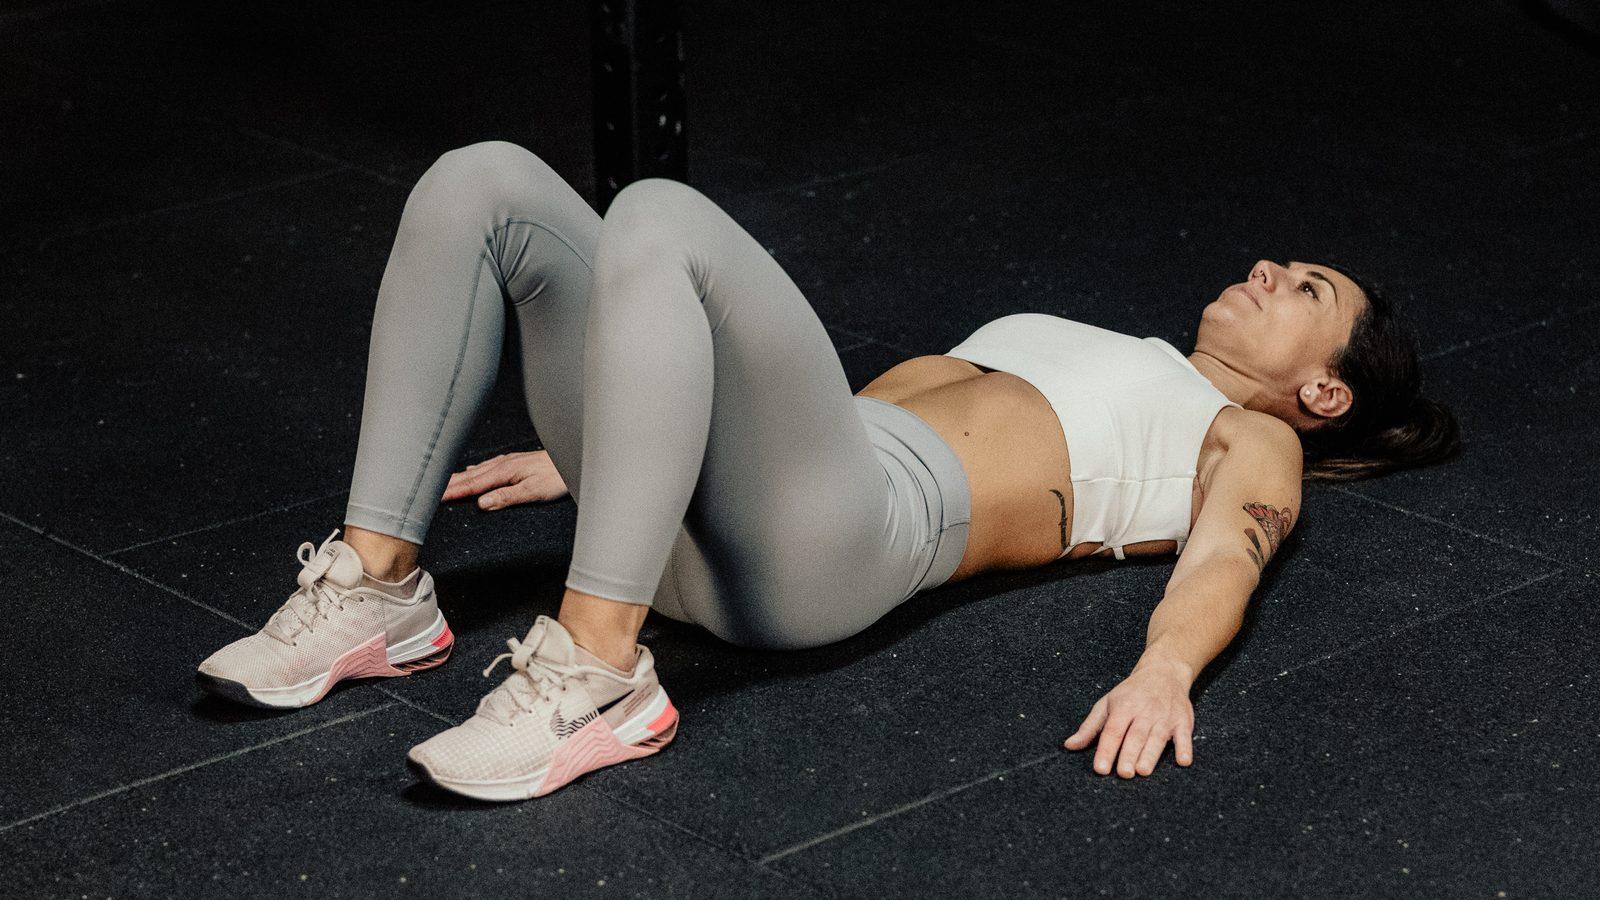
Learn to breathe low. Lying on your back, knees bent, breathe in through your nose and expand below your navel, without lifting your shoulders or chest. This is the foundation: without diaphragmatic breathing, there's no evenly spread pressure.
- 2
Find 360° pressure. Place your hands on your sides, thumbs toward your lower back. As you breathe in, the air should push into your hands from every direction, not just forward.
- 3
Lock in without hollowing or ballooning. Keep that pressure and tighten all the way around, like you're about to take a punch. Rib cage stays down, pelvis neutral.
- 4
Breathe behind the brace. Hold a moderate tension while taking small breaths. It's the key skill for long sets and endurance efforts.
- 5
Load progressively. Start with isometrics on the floor, then standing holds, then your loaded movements. On a heavy set, take a fresh breath and re-brace before every rep, at the top of the movement.
Progression matters more than intensity. A brace that holds under fatigue beats a maximal brace that collapses on the fifth rep.
How Deep builds bracing into the Core program
At Deep, the Core isn't an area you just work randomly. The Core test assesses 7 trunk qualities: flexion, extension, rotation, lateral flexion, stability, motor control and strength. Your results determine the priority deficits your program focuses on.
Bracing is the foundation. The Deep library includes a Bracing category of 9 exercises, designed as a progression, from breath control to bracing under tension.
The 9 Bracing exercises, in 4 stages
- 1
Breathing foundations and control. Diaphragmatic Breathing and Abdominal Vacuum, to learn to breathe low and feel the deep layer of your abdominal wall.
- 2
Unloaded bracing. Core flexion and the Bracing exercise itself, to build 360° pressure without lifting your shoulders.
- 3
Isometric presses. Supine isometric core press and Supine isometric leg press: you press hands and thighs against each other to engage your center without arching.
- 4
KTE planks (knee to elbow). KTE plank, then Cross KTE plank for rotation and Lat KTE plank for lateral flexion.
Each exercise targets a specific deficit: the breathing and press exercises train motor control, the KTE planks train flexion, rotation or lateral flexion. And each one has an easier variant if the exercise is still too demanding.
A priority spot in your sessions
These exercises are prioritized when you start your Core program. They fit into the Deep session structure: an activation, then two blocks combining targeted strengthening on your priority deficits with more global strengthening.
Volume and intensity progress from one cycle to the next, and every session adapts to the time you have: 10, 20 or 30 minutes.
Good to know
Bracing and health
Bracing is a training skill, not a treatment. If you have persistent pain, high blood pressure, are pregnant or have pelvic floor symptoms (leakage, heaviness), see a healthcare professional before ramping up this work, especially the Valsalva maneuver.
Key takeaway
Bracing means locking your trunk by raising intra-abdominal pressure, through a contraction all the way around the trunk combined with controlled breathing. It protects the spine under load and transfers force from the hips to the bar. It's learned step by step, from breathing to bracing under load, and dosed to the effort. It's the foundation of Deep's Core program.
Want to know where your core stands?
Take the prehab assessment